 I was always a big fan of Reese's Peanut Butter Cups when I was a kid. But now that I'm an adult, I've out-grown super sweet and heavily processed treats (big surprise). I often prefer things that are more sophisticated in flavor. It's funny how one's palate changes over the years. Things that I used to love as a kid, I no longer do as an adult, and vice versa. So I started thinking: I should make a grown-up version of those PB cups! It should definitely be rich in flavor and include hazelnut and dark chocolate! Yum!
The task seemed simple enough until I realized that I didn't know where to get chocolate cups. lol! Minor detail (insert sarcasm).

Line a mini muffin pan with mini muffin cups and go over them with a non-stick cooking spray. I use the butter kind for baking.

Melt 1 1/2 cups of dark chocolate chips. This should be enough chocolate to coat 2 dozen mini muffin cups.

Coat the back of a spoon with chocolate.
 Cup the mini muffin cup in the palm of your hand. Brush the sides of the cup with chocolate, using the back of the spoon. Make sure to coat all sides evenly. Double check that there's no thin spots, where you can see the paper through the chocolate.
After brushing each cup, put it back into the muffin pan. Chill in the refrigerator for about an hour, allowing the chocolate to harden fully.
 When the cups are chilled and ready to go, gently tug on the paper and it should come off super easy! (Having nails will help.) Make sure to do it quickly. Tug on both sides at once, so that you're only touching the paper. Since the sides of the chocolate cups are so thin, even touching it for a few seconds will result in melted chocolate on your hands!
Yay! It actually worked!
 Have a chilled baking pan ready before you start peeling the paper off. You can put a pan in the fridge at the same time you put the cups in. During my first attempt, I put the peeled chocolate cups on a regular pan, and after I got half way through the batch, I realized that the bottoms were melting and sticking onto the pan! A second attempt with a chilled baking pan did the trick! I was able to get all two dozen cups unwrapped and into the pan without any damage!
 Now for the filling:
1/2 cup dark chocolate chips
1/2 cup peanut butter
2 Tbsp Nutella
2 1/2 Tbsp heavy cream

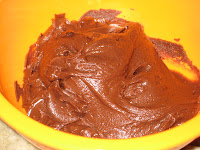
Melt the ingredients and mix well until combined. Allow to cool fully. Refrigerate for about an hour.

When the filling is ready to go, put into a piping bag with a star tip and pipe swirls into the cups.

Pretty! Click to enlarge photo!
Sprinkle with powdered sugar.
Put them in the fridge until you're ready to enjoy!
Put them in the fridge until you're ready to enjoy!

Hubby liked them best when they were at room temperature- both the filling and the chocolate cups were soft and gooey. But I liked them right out of the fridge when they had a bite to them, kinda like truffles! Try them both ways and see which one you like best!


