
The second I saw this recipe featured on Eating Well, Living Thin, I knew I had to try it. It sparked my curiosity, to say the least. I didn't really understand how you could make a healthy chocolate cake, let alone one without flour! I was instantly intrigued. And since I love experimenting with unique recipes, this one immediately made it to the top of my To-Try list.

The secret ingredient? Canned BEANS. Yes, that's right. BEANS- kidney or black, either would work. Isn't that crazy? I just couldn't believe it! In the back of my mind, I thought: wow, this is going to be nasty. But I couldn't help myself. Now I really really had to try it, just to prove that little voice wrong. Especially since the author of Eating Well, Living Thin insists that this will turn out to be a "super moist and delicious cake."
After reading through some of the comments, I noticed that a lot of people left responses saying that Kidney beans work better- they give a better flavor. So that's what decided to use.
Drain and rinse the can of beans.

Pulse them in the food processor with vanilla and 1 tbsp of coffee until smooth. It'll look kinda like a freckled paste/mush. Set aside.
This bean mixture smelled delicious! Like vanilla. Vanilla Beans! Tee-hee.
Don't skip out on the coffee, even if you're not a coffee drinker. This small amount of coffee will really bring out the flavor of the cake. It makes it taste really dark and decadent- like dark chocolate. For you coffee haters out there, you can rest assured that it won't make the whole cake taste like coffee. Just do it. You'll see that I was right when you taste the cake. =)

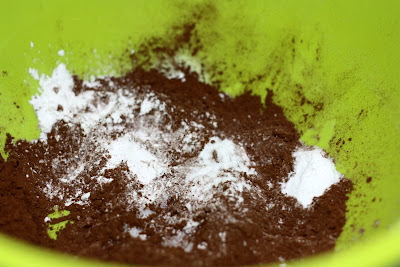
Combine the dry ingredients- unsweetened cocoa powder, baking powder, baking soda, and salt. Set aside.

I always use a high quality cocoa powder - Ghirardelli. It'll really make a difference. Your end product is only as good as the ingredients you put in it. =)

Beat butter and sugar until pale and fluffy. This recipe uses very little butter and sugar. Which is what makes it a healthier cake. (One cup of sugar and less than one stick of butter for the entire cake!)
The original recipe called for a synthetic sugar, in order to make it a completely healthy and sugar-free cake. However, synthetic sugar scares the crap out of me and I would never feed it to my family. (In fact, we're moving towards organic right now, which is completely on the other end of that spectrum.) So I just went with real sugar. This cake is already healthy enough, a little real sugar won't hurt. =)


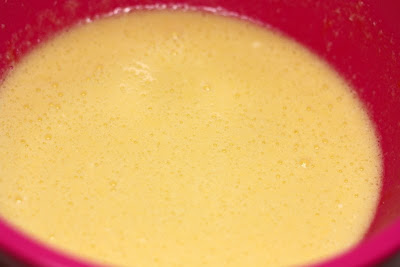
Add in 5 eggs and beat until light & fluffy.
There's a lot of protein in this cake!
There's a lot of protein in this cake!

Mix until well combined.

Mix in the dry ingredients.

The mixture seemed a bit liquidy to me. It wasn't as thick as usual cake batters. (But later, when the cake came out, I realized that it didn't matter.)

Pour into a nine inch, greased springform pan. Bake at 325 for about 35 - 40 minutes.

Allow to cool. Optional, but highly recommended: refrigerate overnight. It smelled pretty good when it came out of the oven - like a chocolate cake. Seemed promising!

Raspberry Coulis is basically a fancy name for raspberry sauce or syrup. It's really delicious on pancakes. You can use fresh berries or frozen ones. I used a bag of sweetened frozen raspberries.

Pour into a nine inch, greased springform pan. Bake at 325 for about 35 - 40 minutes.

Allow to cool. Optional, but highly recommended: refrigerate overnight. It smelled pretty good when it came out of the oven - like a chocolate cake. Seemed promising!
(2) The Raspberry Coulis

Raspberry Coulis is basically a fancy name for raspberry sauce or syrup. It's really delicious on pancakes. You can use fresh berries or frozen ones. I used a bag of sweetened frozen raspberries.

It's really easy to make. You just combine water, sugar, and the berries in a sauce pan. Bring to a boil, then reduce and simmer for about 8-10 minutes. Remove from heat and allow to cool.
You can adjust the sugar to your liking. Add more for a sweeter sauce, less if you like it tart.

Puree with a blender or food processor. Then here comes the hard part: push the sauce through a fine mesh sieve. Sounds easy but it actually takes a long time to do, because of all the seeds. You'll need a large sized sieve. A small one won't work. Put the sieve over a bowl.

Use a spatula to push the raspberry sauce over the sieve, using a back and forth, side to side motion. Spread it over the entire sieve as much as you can. The sauce will be thick, so it won't just run out the other side. Once in a while, turn the sieve around and scrape the sauce from the back side. This will allow more to be pushed through.
Do it in batches. Pour 1/3 of the sauce into the sieve each time. When you can't get any more out, and it's mainly just seeds left (pictured above), discard and pour another 1/3 of the sauce into the sieve. It takes practice. You'll see what I mean when you start to do it. It sounds more complicated than it actually is. Ok, I retract what I said earlier- it's not necessarily hard, just time consuming.

But it's worth it! Afterward, you'll get this gorgeous and oh-so-delicious raspberry sauce!
(3) White Chocolate Mousse


The white chocolate mousse is really easy to make. It's basically melted white chocolate folded into whipped cream. Start with your white chocolate. Make sure to use a good quality one with real cocoa butter in it.
Chop it up into pieces, then melt until completely smooth. Set aside to cool.

Now, start on your whipped cream.


When you're done, it should still pretty much look like whipped cream. Only now it's white chocolate flavored whipped cream! =) Use right away- this does not keep well.


Beat the heavy whipping cream until stiff peaks form. Then add in the melted white chocolate. Beat for another 30 seconds until everything is well combined.

When you're done, it should still pretty much look like whipped cream. Only now it's white chocolate flavored whipped cream! =) Use right away- this does not keep well.
(4) Putting it all together

You'll need some fresh raspberries, of course!


I dusted it with powdered sugar, then added the mousse and fresh raspberries on top! Simple but elegant.

To serve, drizzle the raspberry coulis over the cake and decorate with extra whipped cream and fresh raspberries!

Wow, this cake turned out to be gorgeous! Wouldn't it be the perfect dessert for a romantic Valentine's day dinner? =) You can serve it up in many creative ways!

To serve, drizzle the raspberry coulis over the cake and decorate with extra whipped cream and fresh raspberries!

Wow, this cake turned out to be gorgeous! Wouldn't it be the perfect dessert for a romantic Valentine's day dinner? =) You can serve it up in many creative ways!
Alright, here's the moment you've all been waiting for: The REVIEW. How did it stack up?
*Drumroll*
*Suspense*
*Suspense*
It was absolutely DIVINE. I can honestly say that it was one of the best chocolate cakes I have ever tasted! And by far one of my favorites!!!
I tested it out on my family and friends. No one could guess that there were beans it in! And everyone went crazy for it- saying that it was one of their favorite cakes! Crazy, eh? I can't believe that so many different people came to the same independent conclusion: that a crazy bean cake was one of the best they've had!
Here are the facts:
1. It was insanely moist and fluffy! It can definitely hold its own among "real" cakes.
2. It tasted so decadent, like biting into a really awesome dark chocolate bar. And I don't even like dark chocolate! The splash of coffee really enhanced the chocolate flavor, giving the illusion that you're eating a really fancy dark chocolate cake.
3. Although it tasted decadent, it wasn't actually heavy on the palate, amazingly enough! You know how when you bite into a chocolate torte or heavy chocolate cake, it's so rich that you take three bites of it, and you're done? Well, this one's just the opposite! It was light and fluffy, therefore making it light on the palate. You could literally sit there and eat the entire cake without feeling like it was too rich! And without feeling too guilty! =)
4. The raspberry sauce and white chocolate mousse were the perfect parings for this cake! Since the cake lacked sugar and tasted like a great dark chocolate bar, the sides really complimented its flavor and added a little bit more sweetness, without having it be too sweet. All of the components put together was simply... perfect.
5. I would highly suggest refrigerating it overnight before decorating and serving. I found that the flavors of the cake really pulled together the next day. It's one of those rare cakes that tastes better when cold and straight out of the fridge. When I tasted it after it had cooled on the first day, I thought that I could detect a little bit of the beans in it. But after it had rested in the fridge overnight, it was perfect! It tasted like a super fancy dark chocolate cake- with no bean flavor what so ever!

So there you have it: my favorite cake of all time is not even a legitimate cake! lol. I urge all of you to give this cake a try- for no reason other than the fact that it's strange and interesting!
Click HERE for the recipes!


That looks incredible, Judy!! How funny - I was just wondering earlier today if you'd be posting another recipe soon :) I went through this phase about a year ago where I was trying to make all kinds of desserts "guilt-free"...finally gave up when I realized it's better to just enjoy a smaller amount of the good stuff! But THIS.. this looks like you can actually have your cake and eat it too ;)
ReplyDeleteWhat an amazing find! Thanks for sharing this recipe. I now know what to make for Valentine's day!
ReplyDeleteOh my goodness, how wonderful! I've made flourless chocolate cakes in the past, but never one calling for canned beans as one of the ingredients. What a great idea - I'll definitely put this on the must try list.
ReplyDeleteYour photos are absolutely stunning Judy!
:)
ButterYum
Wow, I really want to try this!
ReplyDeleteOutside of the fact that I made a cake that used a can of tomato soup last week, I would have though you were nuts! Beans? What will they think of next! Makes sense though - I'm sure it gives the cake a dense, moist texture... Judy, it looks wonderful - especially with the whipped cream and berries - so festive for V-Day! Great post! This is something I will have to try and take to work "guess the secret ingredient everyone"! :)
ReplyDeleteThat looks and sounds amazing. You're an excellent photogrpaher. How does this work exactly? What do the beans replace?
ReplyDeleteIn many east Asian cultures, beans are actually the main ingredient in a lot of desserts (i.e. red bean mochi). I will be sure to try this recipe!
ReplyDeleteMhm! This just looks great, even though beans in cakes sound kind of weird in the first moment.
ReplyDeleteOMG OMG OMG!
ReplyDeleteI have to try this!
I loved the cake! Thanks! How did you get the cream and the white chocolate to get a smooth consistency? Mine turned out a little lumpy--from the white chocolate.
ReplyDeleteMrsHwang- you're my first "reviewer" of this recipe! thanks so much for the feedback! I'm so glad that you liked it too!
ReplyDeleteAs for the white chocolate mousse, it's really important for the white chocolate to cool completely. If there's too much of a temp difference between the chocolate and the whipped cream, it'll produce chunks. Also, it helps if you pour it in slowly while the mixer is going... as opposed to stopping the mixer, dumping it all in, and starting the mixer. =)
Come to think of it, you make a good point. The recipe from Salty's isn't super detailed and I dind't realize that it says to "fold it" by hand. I will change it immediately. Thanks for bringing that to my attention!
You're a brave soul :). I've actually been meaning to try some dessert recipes with beans, but haven't had time. So glad it was yummy though! I think growing up with Asian desserts also prepares you for the bean+sugar combo.
ReplyDeleteI made this for valentines dinner tonight, It turned out fantastic! Thank you so much for the recipe.
ReplyDeleteThanks Judy. I did follow the "fold in" the white chocolate. I don't have a stand mixer YET.=) Thanks for the tip! The mousse was good regardless, it just didn't look as good whhen I tried to pipe it on, haha.
ReplyDeleteIt looks delicious aqlthough I wonder just how many calories there are in a slice by the time the mousse has cream and white chocolate in it. I might make the same cake and just use the raspberry coulis to pour over as more of a desert. If you have the nutritional information (calories and carbs) I would be most grateful to know them. The beans in the recipe will work to lower the GI (Glycaemis Index) of the finished product which is good as it saves the "sugar rush"
ReplyDeleteThis is what the original site said:
ReplyDeleteMakes 10 servings. Per Serving: Calories 171; Protein 6 g; Fat 11 g; NET Carbs 10 g; Sugar 5 g; Sodium 155 mg.
But this is just for the cake itself, minus all the whipped cream and raspberry sauce. not sure what the nutrition content in those are. probably not very good for you, i'd imagine! =)
Oh, i forgot to mention that the nutrition content above is if you make it with fake sugar, not the real kind.
ReplyDeleteI tried this wonderful recipe twice: once with kidney beans (good), the second time with cannellini beans (better). I also added a teaspoon of cinnamon.
ReplyDeleteHey Judy,
ReplyDeleteI don't know what I did wrong, but this cake tasted awful!!! It had a horrible bitter aftertaste- but it was light and spongy. It also collapsed in the middle... I obviously messed it up somehow. Going to try again :(
Lynda
Great! super informative blog. . I super love the cake.=)
ReplyDeleteNice post, I would like to request you to one more post about that Keep it up
ReplyDeleteWow that cake looks delicious. Will try it out for sure.
ReplyDeleteReally great post, Thank you for sharing This knowledge.Excellently written article, if only all bloggers offered the same level of content as you, the internet would be a much better place. Please keep it up!
ReplyDeleteAixò és realment interessant, ets un blogger molt hàbil. M'he unit a la seva alimentació i esperem que busquen més del seu missatge meravellós. A més, he compartit el seu lloc en els meus xarxes socials !
ReplyDeleteWow, Great post,Nice work, I would like to read your blog every day Thanks
ReplyDeleteMarvelous !! What an amazing content....subject is very good. Such a beneficial information you have provided that proves it as a golden summary about the topic...thanks.
ReplyDeleteiPhone Developer - iPhone Application Developer
This cake has become the chocolate cake recipe of choice for our family! So moist, so delicious, so beautiful - and eating it is practically guilt-free! High protein content, not too sweet.
ReplyDeleteAmazing :-)
I thought I posted a response earlier, but it doesn't appear to have worked. Do you think this recipe would work for cupcakes? If so, do you have any suggestions?
ReplyDeleteHi Brenna - I think it would be difficult to make this into cupcakes, since it doesn't rise a whole lot. so if you're expecting the nice round tops that come with cupcakes, i think you'll be disappointed. Although, i've never personally tried making them into cupcakes before, so maybe you can give it a try! I personally love experimenting in the kitchen. even if they don't turn out perfectly shaped, they'll still be yummy! =)
ReplyDelete