Wednesday, January 19, 2011

Caramel Corn

I've been meaning to post this fantastic recipe for ages now! Prior to trying this recipe, I had a loathing for caramel corn. lol. Yes, it's true. The only experience I've had with caramel corn was from my childhood, when you'd get the stale kind from a large tin can. Remember those? They had painted santas on them and always contained a super disgusting array of sweet and salty popcorn. We'd get them from family and friends around the holidays. Ick! What a bad way to start off the holiday season.


I got this recipe from my dear friend, Colleen, who frequently inspires me in the kitchen. She is a domestic goddess in her own right and we often take on cooking adventures together. One day, she brought me a small batch of this caramel corn, whipped up fresh from her kitchen. Taking little interest in it, I set it aside and promptly forgot about it...until I was extremely hungry the next day and needed a snack to hold me over. Desperate times calls for desperate measures. And really, beggars can't be choosers. Thinking it would be exactly like those stale batches from my childhood, I took a small bite.

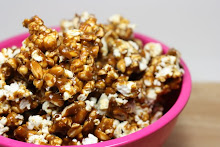
To my surprise, it was crunchy, salty, and utterly deeeeelicious! I felt like doing cartwheels. Yes, this recipe is just that good.


The recipe says to pop your own popcorn with kernels and everything. That was waaaay too intense for me. So I microwaved mine. The good ol' fashioned way of making a quick batch of popcorn. AKA the lazy way. Teehee.


Cover a large cookie sheet with tin foil and brush it lightly with oil. Set aside.


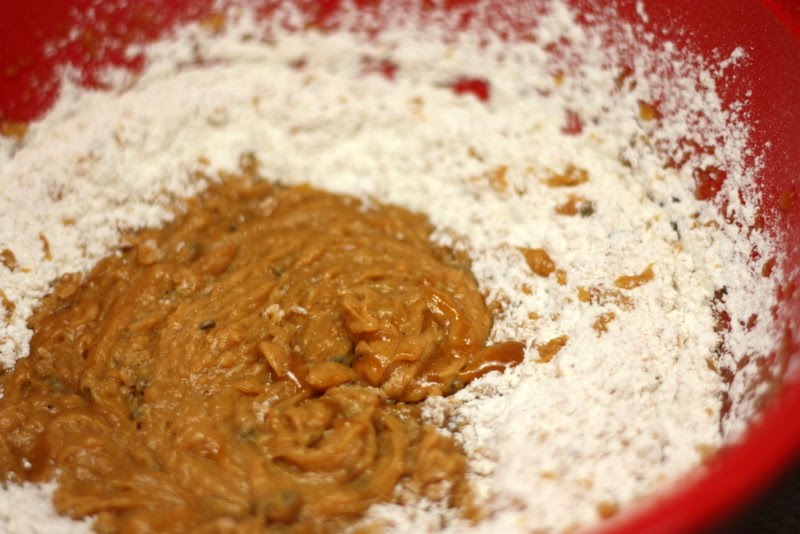
Now comes the fun part - making the caramel! Let a stick of butter melt in a heavy bottomed saucepan.


Now add brown sugar and corn syrup. Let it all melt together.


Then let it boil. Don't stir! Wait until it reaches 300F. This is super important. If the temperature doesn't get high enough, you will not get a hard, crunchy caramel.


It'll reach 300 degrees really quickly, so you have to watch it carefully. Once it does, add in baking soda and salt.


The baking soda will make it swell - like double in size. Then quickly, and I mean quickly, add in the peanuts and popcorn.


Fold it as fast as you can!!!!


The caramel will start to harden instantly and you'll have a hard time coating it if you wait too long.


Try and fold everything in as evenly as possible. Otherwise, you'll get huge lumps of hardened caramel without popcorn... and popcorn without any caramel on it. Which would be super sad.


Get it all nice & evenly coated!


Again, quickly spread the popcorn into a single, thin layer on your cookie sheet. You want to do this fast too, because the caramel will harden quickly and it'll clump into a ball if you don't spread it out in time. Basically, the mixing and the spreading should take less than a minute.


You'll freak out because your beautiful pan will be caked with hardened caramel in less than 30 seconds. And you won't be able to chisel it off with anything. Don't worry! Soak it in water for an hour and when you come back, it'll be completely dissolved and you'll have a perfectly clean pan again!


See? Ta-da!! Good as new!


Let it sit and cool. It'll become completely firm and crunchy. The caramel dries very fast. Wait like 5-10 minutes. Then comes the fun part - break it up into smaller pieces!

I like to store it by lining a covered pan with parchment paper. Any kind of air-tight container will work. It'll still be crunchy (not stale!) the next day.


I just LOVE this recipe. It's super easy to make - takes about 15 minutes and it makes a ton! I've made it several times now and it's always been a huge hit at parties! Everyone always goes crazy over it and asks me for the recipe. If you've never had fresh, homemade caramel corn, you're in for a treat! Give it a try - it'll soon be a favorite among your family and friends too!


Click HERE for the recipe.

Sunday, January 2, 2011

Caramelized Pear Gingerbread Cake

I hope everyone had a great holiday season! Mine was super fun and busy - the in-laws came to visit us and we had a blast! It was our first Christmas ever at our new home and the first time Hubby and I had our very own Christmas tree. It was very special to have everyone come together- both my family and Hubby's. It always smelled like something delicious and it was so festive to have a warm, full, and noisy house! We were so proud to be the ones hosting Christmas this year, especially since, at age 25, we still feel like kids when our parents are around. We are so blessed.


I hope everyone had an equally festive and joyous holiday season!


I made this awesome cake over the holidays and it was a hit! It's an upside down gingerbread cake - you bake it with a gooey topping on the bottom and then flip it. The topping consists of caramelize pear and walnuts. It sounds like a weird combo, but it works! And it's sooo delicious!

Ok, so it's not exactly a looker. It was difficult to get some pretty photos of this cake, so you'll just have to take my word for it that it's a spectacular dessert! Well, on the plus side, at least I won't have to worry about someone stealing my photos from this post, right? tee hee.


You'll need to peel & dice up some ripe pears.


Next, cream together butter and brown sugar until it's crumbly. Press it into the bottom of the pan and half way up the sides.


The recipe said to sprinkle walnuts over the brown sugar crumble. I used pecans. =)


Then top with the diced pears. Set aside.


Next, in a separate bowl, combine the dry ingredients. This recipe has all the yummy & warm holiday spices: ginger, nutmeg, cinnamon, and cloves! Delish!


In another bowl, combine the wet ingredients: eggs, milk, brown sugar, then add the molasses. I love the way it drizzles!


It looks so pretty in the bowl!


Blend and mix well with the dry ingredients.


Pour the batter over the pears. Bake at 350 degrees.


When it comes out, put a plate over the pan and flip it. You'll get this awesome gooey topping over the gingerbread cake! Serve warm and with fresh whipped cream. Mmm...heavenly!


It was suuuuper delicious! The caramelized pear, with the crunch of the pecans were a perfect combination with the gingerbread cake. At first, I was worried that the cake would be too sweet - but it wasn't! It was delicious & moist...and before you knew it, you'd be finishing a giant slice!

This cake is sooo good that it should be served all year round, not just during the holiday season. Really, why don't we serve gingerbread all year round?? It's such a great flavor and shouldn't be reserved for just the last couple of months during the year! I want to start a new movement: gingerbread consumption on a regular basis! =)


CLICK HERE for the printable version of the recipe.

Monday, December 13, 2010

Pumpkin Brown Butter Muffins

Wow, I just had some major blogger drama this morning! I woke up to find that one of my readers had emailed me about a company she found that was using my H Cupcakes photo as their logo! Their company name was H's Cupcakes and they had a "store front" on Facebook. I can't believe they were trying to sell my cupcake creation as their own! Grrr! That made me sooo mad! Luckily, Facebook has an infringement complaint feature and they were able to remove it. I can't believe there are people out there who would plagiarize so shamelessly! (Is it still called "plagiarizing" if it's a photo?) The thing that really makes me mad is that they're trying to sell something to their customers that they didn't even make! How shady is that?! Anyway, I was SO thankful that this reader took the time to email me and let me know. That was such a nice thing to do, wasn't it??

Shesh! Anyway... on to happier topics! Pumpkin Brown Butter Muffins! With sage, no less! Weird, huh? But SO gooood.


Mmmm...brown butter frosting. Delicious!


So as I mentioned before, the secret ingredient in these muffins is sage! At first I thought it would be weird in a sweet muffin. But then I thought of all those times I judged a recipe before making it and all the times those "weird" things turned out to be absolutely divine. So I took a leap of faith. Besides, it's a Martha recipe. You really can't go wrong.


You'll need to chop the sage up into small pieces. I'd like to take this time to rave about my new knife: the 5.5 inch Shun Kaji Santoku Knife. Hubby recently bought it for me. Isn't it a beauty??


Can you see the cool logo on the knife handle? I'm soooo in love with this knife! It cuts into onions and potatoes like butter. It literally cuts prep time in half for those recipes that require a lot of ingredients to be chopped. Magical! I've asked "Santa" for the 8 piece knife block. I think I just might get it!!! =)


Anyway, once you've got your sage chopped up, set it aside to be used later.


Mix together the dry ingredients: flour, cinnamon, nutmeg, cloves... all the yummy Christmas spices. Set aside.


And now for the brown butter. Brown butter is pretty much butter that's browned. lol. Do you like how I explained that so eloquently? =) You melt and heat butter until it's brown, which gives it a super deep, rich, caramel-y flavor. DELISH! If you've never had brown butter treats, you must try it!


Once the butter turns a golden brown, add the sage.


You'll need to skim off the little white foam parts floating on top. Set aside.


(When you add it to the batter, make sure not to pour in the burnt bits at the bottom. ick.)


In another bowl, add the wet ingredients: brown sugar, sugar, eggs, pumpkin, and of course, the brown butter! Mix well.


Incorporate the dry ingredients.


Bake at 325F for 20 minutes.
Can you see the little green sage bits? So pretty!

And now for the brown butter glaze...


You'll need to make another batch of brown butter and add powdered sugar to it, along with vanilla and a tad of milk.


Mix until smooth.


This glaze has a great texture...


It's very soft and liquid-y. The perfect glaze.


To coat your cupcake, dip it into the bowl.


Hold it upside down for a brief second, so the excess can drip off.


Then, rotate the cupcake.


The glaze will coat the cupcake perfectly with no "tail."


The glaze is really pretty - super shiny!


Mmmm so delicious! One of our friends said that it tasted like Christmas! The flavors are really great together. The caramel-y taste of the brown butter goes perfectly with the warm holiday spices.. the sage adds an extra something special. It's a great overall combination!

The frosting will crust over if you leave it overnight in the fridge. But warm it up for 15 seconds in the microwave and it's SO amazing. Give this a try, it'll be a new favorite holiday dessert!


CLICK HERE for the recipe


Related Posts with Thumbnails