


Anyway, I've been so incredibly excited about this recipe ever since attempting it last Friday. I've been dying to share it with all of you! It sure is something to rave about! In fact, I love it so much that I feel compelled to bully all of you, my readers, into making this pie immediately after reading this entry! Don't collect $200, don't past "Go," just go directly to your kitchen and begin to bake! =)
Because it's none other than Tom Douglas' famous Triple Coconut Cream Pie!
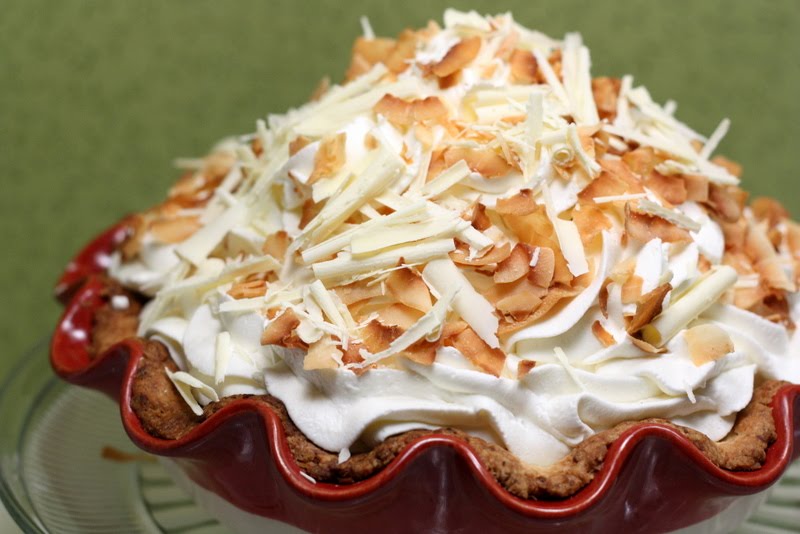
*sigh* Isn't it gorgeous?

Here's another photo of the pie, in case you missed the first one.
Ok, so I hate coconut. Absolutely can't stand it. Seriously. I never order anything coconut. So when my friend, Bryn, fellow foodie and blogger, emailed me about a coconut pie at Dahlia's Bakery, I was super skeptical. She raved about how people who don't even like coconut will like this one, and said something about it providing inspiration to me, because it was just that good. I didn't really understand how my least favorite ingredient can provide inspiration. So, incredibly wary, I Googled Dahlia's and found their menu online. They had some mouthwatering selections. Interesting.
So apparently Bryn's dad is a huge food fanatic and fan/friend of Tom Douglas. The guy apparently does guest posts for Tom's blog! Like it's, you know, no big deal or anything. Insanely cool! So I Googled this pie of Tom's and apparently it's been the #1 famous dessert in Seattle for like 12 years. And apparently every Seattlelite has tried it. Furthermore, even the out-of-towners seem to know about it and it's become a major food attraction. Say what?! I felt ashamed in that moment- I mean, I've always prided myself on being a true Seattlelite, and now that statement seemed to be false. How can I call myself a true Seattlelite if I've never tasted Seattle's most famous pie?
It seemed like the pie now had something to prove. And I had something to prove. If trying this pie would turn me into a true Seattlelite, then eat this pie, I will! Besides, being a passionate coconut hater, I dared this pie to change my mind about that ugly, hairy, and entirely unappealing tropical fruit.
We went that very weekend. Yup. Made a trip into Seattle especially for this pie, braving the wind, the rain, the awful Seattle traffic, and the high probability of not being able to find parking. All for this pie.
The moment I sunk my teeth into it, I thought I had died and gone to Fat Kid's heaven. It was utterly amazing. And I was speechless. It was everything that Bryn promised it would be! The crust was so buttery and flaky. The filling was so creamy, subtly sweet, and light on the palate. And all the while, there was a subtle hint of coconut. I loved it. It was simply divine. I had been inspired. I wanted to run back to my kitchen and attempt to replicate it immediately! Thank you, Bryn!
I was all prepared to research coconut pies for about a month to try to recreate the recipe, when Bryn casually mentioned that she thought her dad had said something about the actual recipe being in one of TD's cookbooks. But she didn't mention which one. So I thought I'd try Googling it. And what do you know? The recipe is everywhere! I can't believe that he would share this recipe with the world! Heck, any other person would've kept it a secret!
I wanted to see if I could execute the recipe and produce something as good as the one I tasted at Dahlia's. So I set out to find only the best ingredients. Because TD's famous pie deserves only the best.


The recipe called for shredded coconut and coconut flakes. I took one look at the shredded coconut at Safeway and thought "ew." So I went off to Whole Foods. They had these beautiful organic shreds and flakes in the bulk food aisle! It wasn't waxy and heavily preserved like the ones you get in a bag at Safeway!

I also got this organic Madagascar vanilla bean that sold for an incredible $170/lb! Luckily, this single vanilla bean was only $3.50. But can you believe the price?! Anything for this amazing pie~!
(1) The Coconut Pie Crust


Combine flour, sugar, shredded coconut, and salt into a food processor. Pulse until you get a crumbly mixture. Then add 3-5 tablespoons of ice water, one tablespoon at a time, until you get this crumbly mixture.

Press the dough into a disk and cover with plastic wrap. Refrigerate for about an hour.

Emile Henry 4 Life! This is the only baking dish that I ever use for pies. Why? Because it has magical pie baking abilities. Yup, it'll give you a perfectly even, golden, and flaky crust every time. Even novices can bake a perfect pie in this baby. I have two large ones and four small ones. lol. Excessive? Not at all.

You know the drill. Roll out the dough on a non-stick surface, preferably with a non-stick rolling pin. Transfer it to your pie plate and cut off the edges.

Return to the fridge for about an hour before baking.


Once the pie dough is properly chilled, place a piece of parchment paper over the pie pan and pour in some ceramic pie weights or beans. Bake for about 20 minutes at 400 degrees F, then remove the parchment paper and beans. Continue to bake for another 14-17 minutes. Keep an eye out. If the edges get too brown, cover it with foil.

Beautiful and perfect! EH does it again!
(2) The Coconut Pastry Cream

Combine milk and shredded coconut into a medium sauce pan.


Split your vanilla bean in half, scrape out the seeds, and add everything to the sauce pan.

Stirring occasionally, bring the mixture up to a boil.

Now, in a separate bowl, whisk together flour, sugar, and eggs until well combined.

Temper the eggs by adding a small amount of the boiled milk & coconut mixture into your egg mixture bowl while whisking. This will keep your eggs from getting scrambled.

Now pour everything back into the medium sauce pan. Whisk over medium-high heat until the pastry cream thickens and begins to bubble. Keep whisking until the mixture is very thick, 4 to 5 minutes more.

Remove the saucepan from the heat. Add in butter and whisk until it melts. Remove and discard the vanilla pod.

Transfer the pastry cream to a bowl and place it over a bowl of ice water. Stir occasionally until it is cool. Place a piece of plastic wrap directly on the surface of the pastry cream to prevent a crust from forming and refrigerate until completely cold. The pastry cream will thicken as it cools.
(3) The Whipped Cream Topping


Use 2 1/2 cups of chilled heavy cream.

Add 1/3 cup of sugar.

Beat on a medium-high speed until stiff peaks form.

A few minutes later, you've got whipped cream! So easy, I could do it in my sleep.
And now for the garnishes- there are two that go on top: white chocolate curls (yum!) and toasted coconut flakes.

I got a really good bar of chocolate from Whole Foods. The real kind with cocoa butter. YUM! You'll need a good peeler. Mine has a ceramic blade that is super heavy duty and won't rust. Only cost like $10 at Sur La Table. A great investment. And it's red! Practically the color of every kitchen utensil I own. hehe.

Here's a trick to getting really smooth curls: hold your hand over the bar for about 30-60 seconds to warm it up before running your peeler over it. It'll give you really smooth, giant chocolate curls! If your chocolate is too cold, you'll get flakes.

To toast your coconut flakes, place them on a cookie sheet and bake for about 7-8 minutes at 350 degrees F. Stir them every 2-3 minutes.

It's better to use a stand mixer for whipped cream. Why? Cuz I'm lazy.

Use 2 1/2 cups of chilled heavy cream.

Add 1/3 cup of sugar.

Beat on a medium-high speed until stiff peaks form.

A few minutes later, you've got whipped cream! So easy, I could do it in my sleep.
(4) The White Chocolate and Coconut Garnishes
And now for the garnishes- there are two that go on top: white chocolate curls (yum!) and toasted coconut flakes.

I got a really good bar of chocolate from Whole Foods. The real kind with cocoa butter. YUM! You'll need a good peeler. Mine has a ceramic blade that is super heavy duty and won't rust. Only cost like $10 at Sur La Table. A great investment. And it's red! Practically the color of every kitchen utensil I own. hehe.

Here's a trick to getting really smooth curls: hold your hand over the bar for about 30-60 seconds to warm it up before running your peeler over it. It'll give you really smooth, giant chocolate curls! If your chocolate is too cold, you'll get flakes.

To toast your coconut flakes, place them on a cookie sheet and bake for about 7-8 minutes at 350 degrees F. Stir them every 2-3 minutes.


First, smooth the pastry cream into the cooled pie shell.

Place your whipped cream into a pastry bag with a jumbo tip.


Pipe on your whipped cream to get beautiful giant swirls!


Garnish with lots of white chocolate and coconut flakes!

Keep chilled in the fridge until ready to serve. It will only be good for about 24 hours. If you leave it for 48 hours, the crust will get slightly soggy.
Wow, so I don't know if it was my super high quality organic ingredients or my meticulous attention to executing this recipe, but the pie was glorious! It tasted just like the real thing! The pastry cream and whipped cream was so light and fluffy~! And even with my super expensive ingredients, it was still less than what you would pay at Dahlia's ($35) !
And now, not only have I tasted the pie, I have made it in my kitchen. I am officially a true Seattlelite! lol.
My friend Karen took most of it to her family get-together. She said that her family usually doesn't like traditional "western" desserts (they're Chinese), but they loved this pie and consumed the entire thing! I guess Bryn was right- it converts all haters! lol. Karen said she wished there was more crust! I agree 110%. The crust is always the best part of any pie, in my opinion. mmmm....caaarbs! This one was especially unique because it had coconut shreds in it. =)
Alright, so....now is the time to get out of your chair and go straight to your kitchen to try out this recipe!
Tom Douglas' Triple Coconut Cream Pie
From Tom Douglas' Seattle Kitchen
Please click HERE for the entire recipe.


Yay! Nice post! Haha, Mochi is helping me write the post right now - he's so excited about the pie :-) (He keeps resting his chin on the RETURN key and I have to keep hitting delete!)
ReplyDeleteLooks delicious and makes me think I could actually attempt it. We'll have to see. Nicely done. It's beautiful! I'm really jealous I don't live closer...I would have taste tested for you!
I had this pie at Lola, and loved it! It's a bit of an elaborate production (I'm not a pie-baker YET), but looks completely worth it. Gorgeous pics & love the step by step instructions ... you've convinced me to try this out for myself!
ReplyDeletelovely! love your photos and that pie looks utterly delicious! soo wish we lived near each other!
ReplyDeletethanks for your lovely comments, all!
ReplyDeleteit is a super extensive pie. it takes about 5-6 hours from beginning to end. but if you break it down, it's not so hard. SO worth the time and effort! =)
That looks amazing! A real custard pie. I think actually it's more of a tart, but since I am not from Seattle, I am going to lay off laying a name claim... Way to celebrate feeling better too.
ReplyDeleteThanks for checking me out Judy. Looking forward to your next post.
I love this post! It made me laugh, it made me hungry and it made me jealous (you have awesome pictures!). I'm going to look up this recipe when I get home.
ReplyDeletebtw... how do you take such great pictures? Do you use natural light or do you have special lighting in your kitchen?
What a showstopper dessert. photos are beautiful too.
ReplyDeleteWonderful photos! Looks delicious!
ReplyDeleteYou have a wonderful writing style that makes me feel like I'm talking to a good friend! I can't wait to try this pie!! Your photo's are totally off the hook. I'm green with envy!
ReplyDeleteI love those swirls of cream, so rich and luxurious. We're totally in agreement about coconut recipes in general so I'm willing to take your word for this one and try it. Bookmarked!
ReplyDeleteOK, so we were on the fence about coming home for Christmas, but this post convinced us that the 3,236 mile drive is worth it...after we try it at Dahlia's, we'll make it for the whole fam-damily
ReplyDeleteWhat??? Another post I didn't get notification of? What's going on here??? What else have I missed? Sigh!!!!!
ReplyDeleteOkay, on to your amazing pie - WOW!!! How did you know coconut cream was one of my favorites? Yours looks absolutely heavenly.
:)
ButterYum
Judy, I've been meaning to try this pie, and today was the day! I am sorry I didn't make it earlier! =) I had a little trouble with the crust (no food processor). Still, everything else was very delicious. It is a keeper. Thanks!
ReplyDeleteMrsH- so glad you enjoyed it! I love this pie!
ReplyDeleteYeah, a food processor makes your life so much easier. you just pulse a few times and the crust comes together. i can't say that i'd be able to make it by hand either! =)
Very impressed with your presentation of the ingredients, the recipe and your thoughts. I do not have a food blog but an art blog in which I sometimes add a recipe. I was given the most spectacular recipe for lasagna that you might want to check out.
ReplyDeletehttp://www.healingwoman.blogspot.com
BTW, I consider cooking/baking an art too!
Best,
Cheryl
Healingwoman
Hello, one question.
ReplyDeleteHow come you never say the ingredients we need to use? I mean the ammount of each ingredient...
how are we supposed to make this cake if we don't know how much flour we have to use?... just that.. thank you.
if you had read the article, then you would have noticed where it says "CLICK HERE" for the recipe. all my posts have recipes listed as a link to click on for a printable version. to me, it doesn't make a whole lot of sense to write about a recipe but not actually post it.
ReplyDelete