Showing posts with label Apple. Show all posts

Friday, January 29, 2010

Dulce de Leche Apple Cinnamon Rolls

Wow, I was so amazed and touched by the flood of comments that came in about my last post, the Lamington Debacle! Thank you so much for all your supportive comments- it made me feel ten times better about the whole situation! I really can't express how much your encouragement means to me- it keeps me going and makes me feel like the time and effort I put into this blog is all SO worthwhile. I'm really glad that so many of you are able to benefit from even my failed recipes! As far as future kitchen disasters- I will fear not! hehe. I might even post more of them, seeing as so many of you enjoyed reading about it! =)

One good thing did come out of the whole Lamington mess: my discovery of dulce de leche in the form of sweetened condensed milk! I've been utterly obsessed with it recently and wanted to find different ways to use it...


So here's what I came up with: dulce de leche smeared on top of cinnamon rolls. But not just any cinnamon rolls- we're talking ones with apple pie filling in them! Need I say more?

(1) Dulce de Leche


If you missed my last post about the dulce de leche, here's a quick recap:


Basically, take a can of sweetened condensed milk- all you have to do is rip the wrapper off and then boil the heck out of it for three hours straight. Yes, you're boiling the can itself, unopened. How cool is that?! Wait for it to cool completely (crucial), then when you open it up, it's thick, beautiful, and utterly divine!

Here are a few tips:
  • Run it under cold water if you want it to cool faster, but don't open it until it's completely cooled.
  • You can boil it for up to four hours - the longer you boil it, the thicker it becomes.
  • Vice versa, if you want a more runny version, boil it for only two hours.
  • Have a pot of extra boiling water handy, because as the pot boils, it will evaporate. So you'll need to add extra water every 20-30 minutes, to make sure the can stays immersed the whole time.
It's pretty easy to do. Three hours seems like a long time, but it actually doesn't require a whole lot of maintenance. Just pour more water in it every once in a while. Then three hours later, you've got perfect dulce de leche that soooo good, you'll want to spoon it straight into your mouth, which I have done...on many, many occasions.

In fact, I'm not even ashamed to suggest the following:
Say you have five people coming over for a dinner party and you don't know what to do for dessert. Well, why don't you just boil five cans of sweetened condensed milk?! Serve it up straight from the can! lol. Okok, kidding. But YES, it really IS THAT GOOD. I promise. =)

(2) Apple Cinnamon Rolls


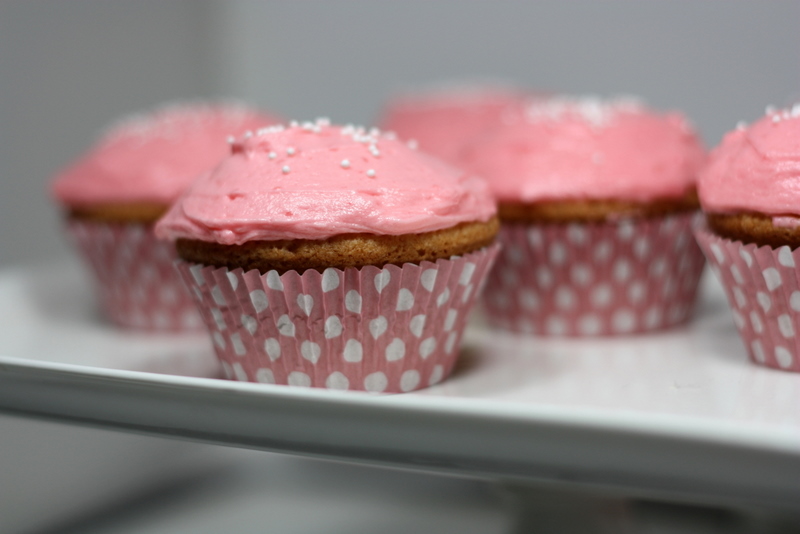
In case you missed the first two pictures, here's another one to refresh your memory. =) Not only does it taste good, it's also a beauty and photographs soo nicely! Tee hee.


Combine 1 cup of flour, sugar, yeast, and salt.


In a separate bowl, heat up water, milk, and butter until very warm.


Then slowly add it to the dry mixture. Beat for about 2 minutes on medium speed.


Then add eggs and 1 more cup of flour, beat for another 2 minutes or so. Stir enough of the remaining flour to make the dough soft.


Kneed on a lightly floured surface until smooth and elastic. The recipe says to kneed it for about 8 to 10 minutes. But I didn't have the patience. hehe. I did it for like 3 minutes and called it good. Mine still turned out perfect, so I don't think it mattered in the end. Cover and let rest for about 10 minutes.

(2) The Apple Pie Filling


You'll need 4 large granny smith apples. As large as you can get them! Chop them up into small cubes.


It's super easy to make. Just dump everything into a pot: the apples, some flour, butter, sugar, and brown sugar. Then bring to a boil, cook for about 3 minutes. Reduce the heat and simmer for like 10 minutes, stirring, until it becomes thick. Mix in some cinnamon at the end and you're done!

(3) Putting it all together


Divide your dough in half and roll out two large rectangular slabs. About 15x10 in. Doesn't have to be exact. Divide the apple pie filling in half and evenly spread them over the two rectangular slabs of dough.

Starting from the side that's longer in length, roll up the dough. You'll end up with a long roll (about 15 inches in length). Cut each log evenly into 8 or 9 pieces and place them into a greased 9-inch spring form pan. You'll need two 9-inch pans, one for each log.


After you've fit them all into the pan, cover and allow them to double in size, about 45 minutes.


Bake for about 25-30 minutes at 375.


Allow to cool slightly before removing from the pan. The sides should leave the pan nicely.


And now, for the best part: slather on a good thick layer of warm dulce de leche! One can for each batch of cinnamon rolls!


Serve these warm and straight out of the oven for best results!


MMMmmm...SO delish!! Everyone who tried these were so floored by how delicious they were! They certainly aren't your normal run-of-the-mill cinnamon rolls, that's for sure! I sent some home with my friend Karen, who later told me that she loved them so much, she ate two a day, everyday for breakfast!

Give these a try- you can never go wrong with apple pie filling and dulce de leche! YUM!


Click HERE for the recipe
~~~~~~~~~~~~~~~~~~~~~~~~
EDIT:

After posting this, a reader emailed me, saying that sometimes boiling a can of sweetened condensed milk can be dangerous. If it isn't completely submerged in water at all times, it can explode. So you have to be really careful about keeping an eye on the water level. You can also make dulce de leche by pouring the sweetened condensed milk into a pie plate, covering it tightly with aluminum foil, and placing it in a water bath to bake for 1-1.5 hours. This method is safer. Here's a great link that she sent me. Thanks Jeana!

Wednesday, October 7, 2009

Applesauce Cupcakes with Caramelized Apple Swiss Meringue Buttercream


Applesauce Spice Cupcakes, topped with a Caramelized Apple Swiss Meringue Buttercream. The chunks of apple in this butter cream = pure joy to your taste buds!


Yup. It pretty much speaks for itself. Hubby went crazy over this one! Said it was his "favorite cupcake so far," which is a big statement to make, seeing as I've made a few really good ones in the past few months. =) I think he's just a sucker for the Swiss Meringue Buttercream...add apple pie filling to it and Hubby's in cupcake heaven!

This is the last installment of the Welcome Autumn: Apple Series. If you missed it, the first awesome apple recipe was Classic Apple Pie! And the second equally awesome one was French Toast topped with Caramelized Apple, Cardamom Whipped Cream, and Candied Walnuts. Be sure to check them out. And don't miss the Welcome Autumn: Pumpkin Series to follow shortly!


First, make the apple pie filling for your buttercream. It's apple caramelized in butter and delicious apple pie spices! You want to make sure to chop the apple into small cubes. I'm talking 1 cm cubes! It's going to weigh down your buttercream if you make them too big. Then you won't be able to produce the nice swirl of frosting.


When done, set aside to cool. This may take a couple of hours. You want it to be at room temperature when you mix it into the buttercream. You can put it in the fridge to speed things up, but please pay close attention to it. You don't want it to be too cold, either. It has to be at the same temp as your butter, or else you won't get the correct buttercream consistency. Trust me, you'll be SO frustrated if your buttercream is the wrong consistency. lol. Definitely speaking from experience here.. =)


Next, the cupcakes. I got this recipe from my Martha Stewart Cupcake book. It's a fragrant spice cake, made with applesauce! SO delicious! It tastes like....well, autumn! This would be a great addition to the dessert table at Thanksgiving.


Mix the wet ingredients together: butter, sugar, eggs, and of course, applesauce! It called for unsweetened applesauce, but I only had the sweetened kind. I was afraid that it would turn out too sweet, but it was great!


Fold in the dry ingredients. It included fragrant spices like cinnamon, nutmeg, and cloves!


Pretty shinny gold batter!


Bake at 350 degrees for about 20 minutes.


Now for the wonderful buttercream- the main attraction! Swiss Meringue Buttercream is super high maintenance, but totally worth the effort! For those of you who have never made it before, please read this post before attempting. It gives you step by step instructions that will be invaluable to you on your buttercream adventure! =)


Once your buttercream is complete, add in the apple pie filling. Mix for about 30-60 seconds until well incorporated.


You'll get this beautiful and shiny buttercream with chunks of caramelized apple! The thing that I LOVE about this buttercream is the fact that it's subtly sweet. It's not super overpowering in sugar/sweetness, like other frostings. You'll get this light, fluffy, and subtle buttercream that tastes like apple pie and has chunks of apple in every bite. Heaven.


If you use a piping bag to frost your cupcakes, make sure to use a jumbo sized, open tip one so that the apple chunks can come through.


Sprinkle with a pinch of cinnamon! =)


I love this cupcake! It tastes so gourmet. It's definitely not your run-of-the-mill cupcake. It has fantastic flavors, and the apple really comes through. Both the cake and the buttercream are subtly sweet, allowing you to really taste all the flavors of the spices and apple!

Maybe Hubby was right. I really do hate to play favorites among my cupcake creations. You know how I am about cupcakes- they're my babies! But I might have to admit that this one definitely takes the [cup]cake! =)


Note: It's super important to allow these cupcakes to warm up to room temperature before serving, should you keep them in the fridge overnight.


Please click HERE for the recipes shown on this entry.


Sunday, October 4, 2009

Amazing French Toast


This french toast is like none other! Egg battered sweet challah bread, topped with caramelized apples, candied walnuts, and freshly made cardamom whipped cream. You won't need maple syrup for this one!

This is the second installment of the Welcome Autumn: Apple Series. If you missed it, the first awesome apple recipe was Classic Apple Pie! And be sure to stay tuned for the last recipe of the series: Applesauce Spice Cupcakes, topped with a Caramelized Apple Swiss Meringue Buttercream.


A couple of weeks ago, Hubby and I took the ferry to Orcas Island for a romantic get-away. The views there were breathtaking and the food was exquisite! Hubby and I went to a great place for brunch- the New Leaf Cafe and Lounge. I usually like savory foods for brunch, but one item on the menu caught my eye: a super fancy french toast! Upon first bite, I thought I had died and gone to heaven. It was the most amazing french toast ever. The flavors were mind-blowing and I couldn't stop thinking about it ever since!

And like any good domestic goddess wanna-be, I promised Hubby that I would try my hand at it. He wanted to be able to have it upon request, as opposed to an hour's drive + a 1.5 hour ferry ride.


Start with the apples. You'll need 2 granny smith apples, chopped. We're making caramelized apples, which is basically apple pie filling. YUM!


Combine apples, butter, flour, sugar, brown sugar, cinnamon, and water. Cook down the apples on medium-low heat for about 15-20 minutes, until thick. Set aside to cool slightly.


Next, the cardamom whipped cream! This is the best part of the french toast. It plays a crucial part in the flavors of this dish. It's so refreshing and delicious!


Before this amazing dish, I didn't know what cardamom was. I ordered it because the description sounded good. But after the first bite, I immediately knew that it was the unique taste of the whipped cream that make this dish so amazing.

Cardamom is a unique eastern spice. It tastes like a combination of nutmeg, cinnamon, and fresh citrus! It's the perfect autumn spice!

It's pretty expensive if you buy an entire jar. But I purchased a tiny amount of it at Whole Foods for less than a dollar in the bulk spice aisle. It sells for something like $2.79/oz. But you only need 1/4 of a teaspoon, so it's no big deal. Most places that sell bulk spice will have it.


Beat heavy whipping cream on medium speed until it doubles in size. Then add vanilla, sugar, and cardamom. Continue beating until stiff peaks form. The aroma of the fragrant spice instantly filled the room. It smelled so incredible!


Lastly, prepare the french toast. You'll need six slices of challah, cut about 1/2 inch thick. Challah is perfect for french toast. It can withstand soaking in the egg batter and it has a subtly sweet taste. Delicious! I could eat an entire loaf all on its own!


To make the egg batter, combine eggs, milk, and orange juice. Mix well until fully incorporated.

Coat the bread in egg batter and place on a buttered griddle on medium heat for 2-3 minutes on each side.


Top the toast with the caramelized apple, cardamom whipped cream, and candied walnuts!


I was making up this recipe as I went...and to our surprise, it tasted incredibly similar to the one we had on Orcas! The slightly tangy tartness of the granny smith apples, coupled with the sweetness of the french toast was the perfect flavor balance. The amazing cardamom whipped cream gave it an extra edge- super fragrant and citrus-y!

Utter perfection.

This is a definite must-try recipe!


Please click HERE for all the recipes shown in this entry.

Wednesday, September 30, 2009

Apple Pie

As promised, here's the first recipe in the Welcome Autumn: Apple Series!


I love apple pie! It's a classic that will never go out of style! Serve it up with some vanilla ice cream and you've yourself a little slice of heaven. Here is my go-to recipe, one that everyone should have in their recipe box! Not all pies are created equal...and this one ranks far above the rest. =)

Start with the crust. Prepare it about 2 hours beforehand because it needs to be refrigerated. To me, the crust is the most important part. Mmmm...carbs! As I always say: if you've got a fantastic crust, it doesn't really matter what you put in it! I've tried tons of pie crust recipes...some aren't flaky enough, others are too soft and difficult to work with, blah blah. None of them have stacked up to this one: the ultimate pie crust by WS. It's the only recipe for crust you'll ever need. I use it for everything from fruit to chicken! It has a great buttery and flaky texture- so delicious. And it's also easy to work with, which is super important.


Combine ingredients in a food processor according to the recipe's instructions. When it comes out, it should look like this: kinda crumbly.


Gently push the dough together and form into two round disks. I like to make one slightly larger than the other, because the bottom crust will need more dough than the top. Wrap tightly in saran wrap. Refrigerate for at least 2 hours.


For more tips on working with pie crust, please read two of my older posts: (1) All about pies, and (2) Blueberry pie. Pie crust can be difficult to work with for first time bakers, so be sure to read these before attempting!


Next, start on the pie filling. See recipe below. I like this recipe a lot because it requires cooking the apple first to create a thick filling. I hate it when I get a runny, watery pie that makes the crust soggy!


Chop up about 6 large granny smith apples. The recipe calls for a dutch oven. But those things are so heavy and super expensive. Not everyone has one, so if you don't, any old pot will do!


Cook for about 30 minutes with a few fantastic ingredients: cinnamon, nutmeg, brown sugar, etc. It'll cook down to create a great pie filling!


Pour the filling into the pie crust you prepared earlier. Add a few cubes of butter throughout, then start on the top crust.


Creating a lattice can be tricky. You have to start in the middle of the pie and work your way out. Again, for first timers, please refer to my Blueberry Pie entry for tips and tricks.


I got these great star shaped pie crust cutters from WS! They came in a great set of four. For more info on these awesome cutters, see this prior post where I used them to make bite sized chocolate graham crackers!


The cutters are great! I love them. They really "fancy up" your pie! =)


Bake for about 45-50 minutes. Check on it half way through to make sure your crust isn't browning too much. If it is, cover the top with foil.


Mmmmm! Serve with vanilla ice cream!


Stay tuned for the second and third installments of the Welcome Autumn: Apple Series. Don't miss out on these two fantastic apple recipes to come:
  • French Toast topped with Caramelized Apple, Cardamom Whipped Cream, and Candied Walnuts.

For the recipes shown on this entry, please click HERE.


Related Posts with Thumbnails