 I've always wanted to try my hand at tarts! They're just so pretty, if nothing else! I love the beautiful scalloped edges and the concept of a delicate pastry shell functioning as a fruit bowl.
Jerr casually mentioned the other day that tarts aren't very different from pies. And since then, I've obsessed over finding the perfect recipe and tart pan. Now that I'm pretty confident in my pie baking skills, I thought I'd move onto something that's seemingly more difficult. Baby steps, right?

I'm slightly ashamed that I didn't know this before...but while shopping for tart pans, I realized that most of them conveniently had bottoms that popped out, making it super easy for removal! This was something that I had worried about, that kept me from attempting it sooner. The scalloped edges seemed so delicate and I was convinced that I would break the pastry before I could get it out in one piece. But apparently the Baking Gods thought of everything when they created this perfect, user-friendly piece! But just to be on the safe side, I took extra precaution by getting a non-stick one (the Baking Gods can only do so much when up against my clumsiness).
Ok anyway, enough babbling. Here's documentation of my tart baking adventure:
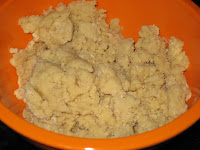
 The dough is pretty straight-forward and "easy to understand," once you've worked with pie dough. The two are quite similar in texture and you work with them in the same way. The tart dough was maybe a taaaad less fragile. (Refer to these two posts for tips: Blueberry Pie and All About Pies.)
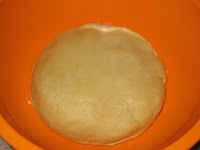
 Form into a ball to refrigerate. The recipe said to chill for 30 mins, but that was definitely not enough time! Even with my non-stick mat, the dough was too warm and difficult to lift off without breaking. I'd say chill for at least 1-2 hrs.
 Next, roll out the dough and press it into the tart pan. Pretty easy, if you've chilled it sufficiently. If you find it to be too difficult to work with, roll it back up and stick it in the fridge for longer.
Before baking, cover the pie crust with wax paper or foil and pour a bag of beans or pie weights into the pan. I've been meaning to get a jar of ceramic pie weights, but haven't gotten around to it.
 So I used beans. This step is necessary because it keeps the crust from blistering or producing air bubbles while baking. Also, the ceramic ones are nice because it allows the crust to bake evenly.
After baking with the beans for 5 minutes, remove them and poke the crust with a fork before putting it back into the oven. Poking it also makes sure it doesn't puff up and break your crust.

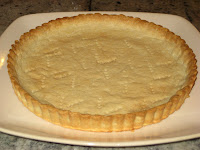
The crust came out a perfect golden brown...

...and I had no trouble popping it out of the pan! Thank you, Baking Gods!

Next, onto the filling! It was pretty straight-forward and the instructions were easy to follow. It turned out to be a pretty, soft yellow color, with the consistency of vanilla pudding.
 The recipe said to refrigerate the filling before spreading it into the tart crust. However, when I pulled it out of the fridge, it had become super solidified and difficult to spread (think play-dough consistency). But I was able to thin it out by mixing 1 Tbsp of cream (or milk) at a time, until it thinned out enough to spread. About 2-3 Tbsp total.
It was pretty easy to spread once the cream was well mixed.

In the recipe, they used a mixture of berries, but since I've been on this summer-induced blueberry craze... =)

Spread the blueberries over the tart filling. I like a lot of berries on my tarts, so I piled it on until it practically overflowed!
Sprinkle with powdered sugar and here you have it:
 This recipe was fantastic! My family went crazy for it and it disappeared within a few hours. The filling was especially great! It had a custard-like consistency and was light on the palate...not too sweet, but just sweet enough. The dough wasn't especially heavy and buttery like pie crusts are, which added to the lightness. In the summer, when I crave sweets, I usually want something on the lighter side. This was the perfect kind of dessert for those hot summer days! The sweetness of the berries was the highlight of this treat!


No comments:
Post a Comment